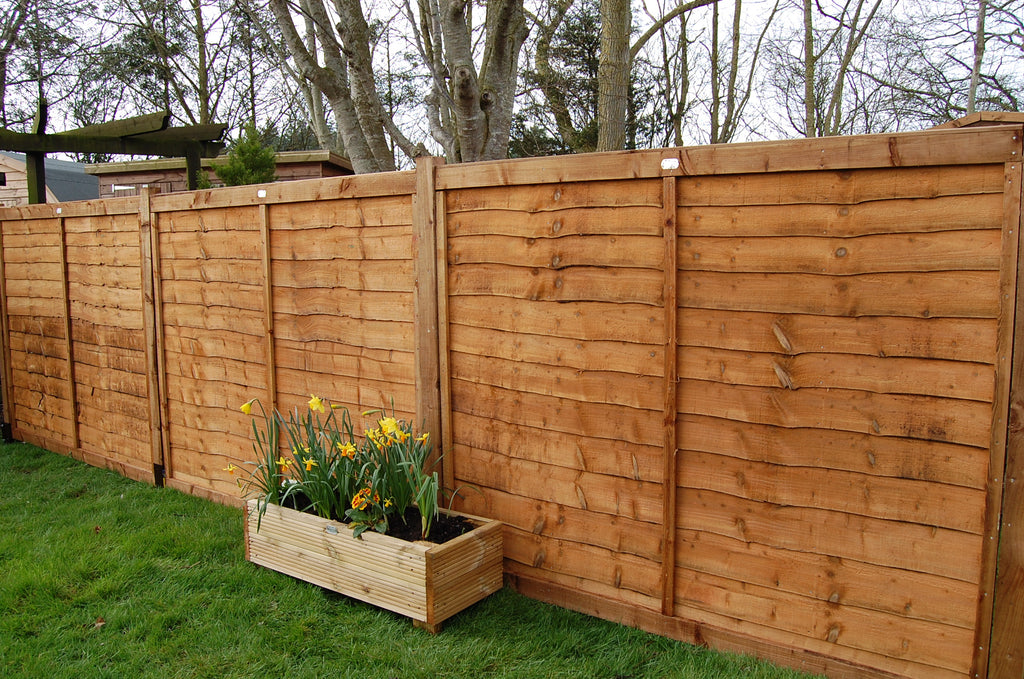
When investing in new garden fence panels it’s important to plan and prepare so that you purchase quality timber and fittings, as well as bespoke design or sizes if needed.
Before you get started, there are some areas you’ll need to consider when putting up a garden fence.
1. Check your property boundaries
Before you go full steam ahead with the installation of your fencing project, it’s best to check the property boundaries and talk to your neighbours about your plans.
It’s not always possible to establish ownership of fencing, but look for the ‘T’ or ‘H’ shape that denotes ownership in your deeds for an indication. This guide from the Land Registry gives detailed information about boundaries.
It’s always best to let your neighbours know what you’ll be doing when replacing garden fencing – especially if there could be potential disruption to their garden.
2. Check if you need planning permission
Although most fences don’t need planning permission, some fencing projects in England may need planning permission if:
- The fence is higher than two metres.
- The fence is over one metre high and next to a road.
- Your house is a listed building or it neighbours a listed building.
In any case, it’s always best to check with your local council for the most up to date information. The GOV.UK website features more information about planning permission.
3. Check you won’t be disturbing water pipes or power cables
Once you’ve done your checks, it’s now time to decide on your wood fence panels and posts.
4. Choose your fence panels and posts
There’s a wide range of fence panels available at our showroom in Mark, Somerset and on our website – from contemporary to traditional as well as fence posts, gravel boards and fencing components that you may need, including:
- Overlap fence panels
- Waney edge fence panels
- Wooden posts
- Rails for post and rail fencing
- Components
- Postcrete
- Gravel boards
See our fencing section for the full range. You can buy online or in store, where many of our fencing products are available to view if you’d like to see the difference in quality before you buy.
5. Measure up your fencing area
Once you’ve decided which type of fencing is right, you’ll need to measure up. This will tell you how much fencing you’ll need.
Our detailed guide to measuring up fencing will give you plenty of useful information.
6. Prepare for installing your garden fence panels
Once your fence panels have arrived and you’re ready to go, it’s time to prep the area! Before you start installing the fence panels and posts it’s a good idea to do the following:
- Remove any old fencing.
- Move any plants to ensure they’re not damaged during the fencing installation.
- Remove weeds and unwanted climbers.
- Level out the ground.
- Remove any stones or concrete.
- Move any other obstacles (such as garden furniture) in your garden that may block access.
7. Lay out your timber fence panels
Before you start, lay out your fencing panels and posts where they will be erected. This will help ensure you have got your measurements right and avoid any unnecessary complications later on.
Depending on the shape of your garden, it is likely you may need to cut some of your fence panels to fit.
8. Erect your fence posts
There are several methods for securing your wooden (or concrete) fence posts, including:
- Using post supports. Drive in spikes are quick and easy to use, eliminating the need for concrete. They also make it easier to move or replace your fence at a later date. However, they will not work in rocky ground.
- Concreting your posts in the ground using Postcrete. If you're using concrete, check your posts are level before concrete has set.
- Other solutions, such as bolt downs and concrete ins (for where normal drive in post supports cannot go, for example rocky ground).
This is quite a physical job, so you’ll find it a lot easier if you have at least one helper.
Putting up a garden fence on sloping ground:
If you’re putting up a panel fence on a slope, the process is a little different. You will need to adjust the placement of your posts and panels to allow for the gradient.
An easy way to do this is to add steps to your fence – keep the panels level, but increase or decrease the height in line with the slope. You may need to fill any resulting gaps beneath your fence with extra gravel board.
9. Add your wood fence panels
Once your posts are in place and level, the next step is to attach the panels. To attach panels you can either use nails or fixing brackets.
Check they are level as you go using a spirit level.
10. Install gravel boards and finishing touches
When the panels are secured, install gravel boards horizontally at the base of your fence. Available in both concrete and pressure treated wood, they help fill the gap between the bottom of your fence and the ground, while protecting your fence panels from rot.
The final step is to add any finishing touches to your fence, such as trellis, post caps and panel capping.
Need support from our fencing specialists?
For any fencing queries, please contact the Somerlap team today. We are also on hand to assist with installation if required and can arrange for one of our approved installers to visit and provide a quote.
Opening hours: Monday to Friday: 8.00am – 4.30pm | Saturday: 8.00am – 12.30pm | Closed all bank holidays
